
Thermit Welding Process
• Preparation:
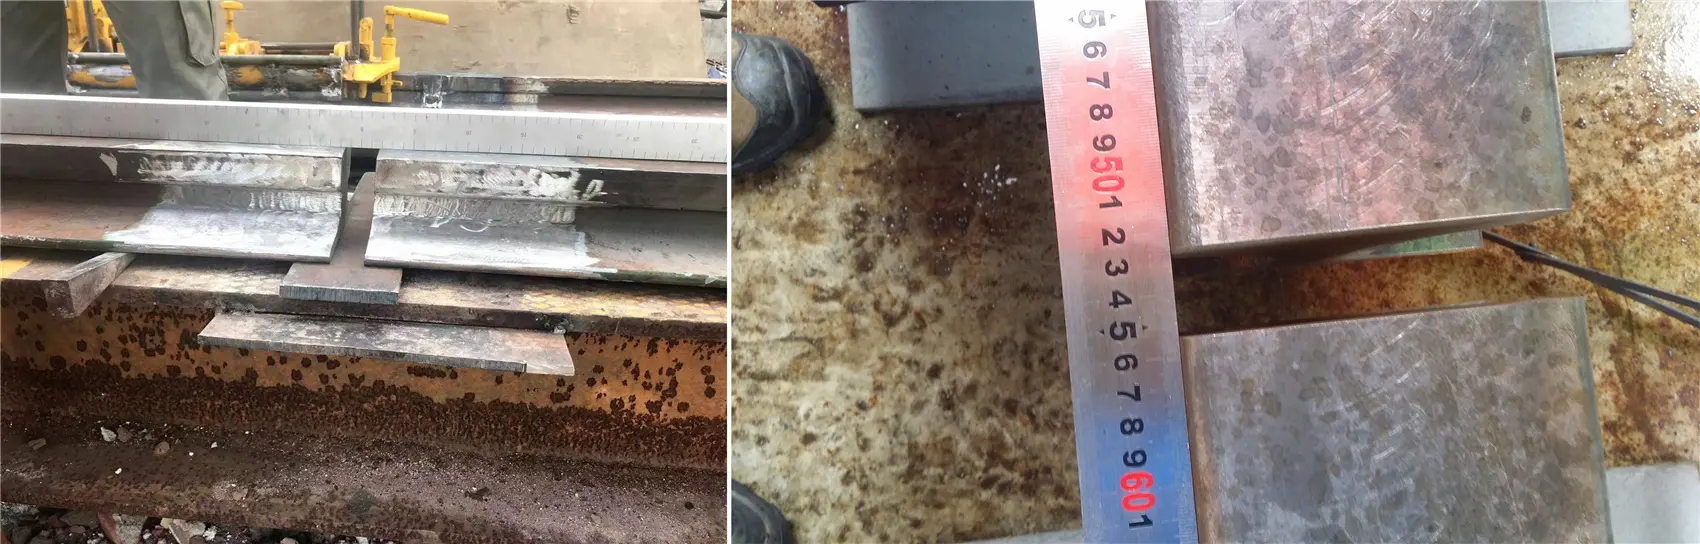
Stp.1 Ensure the rail ends to be welded are clean, free from rust, and properly aligned. The gap size (space between two rails to be welded)shall be 26±2mm.
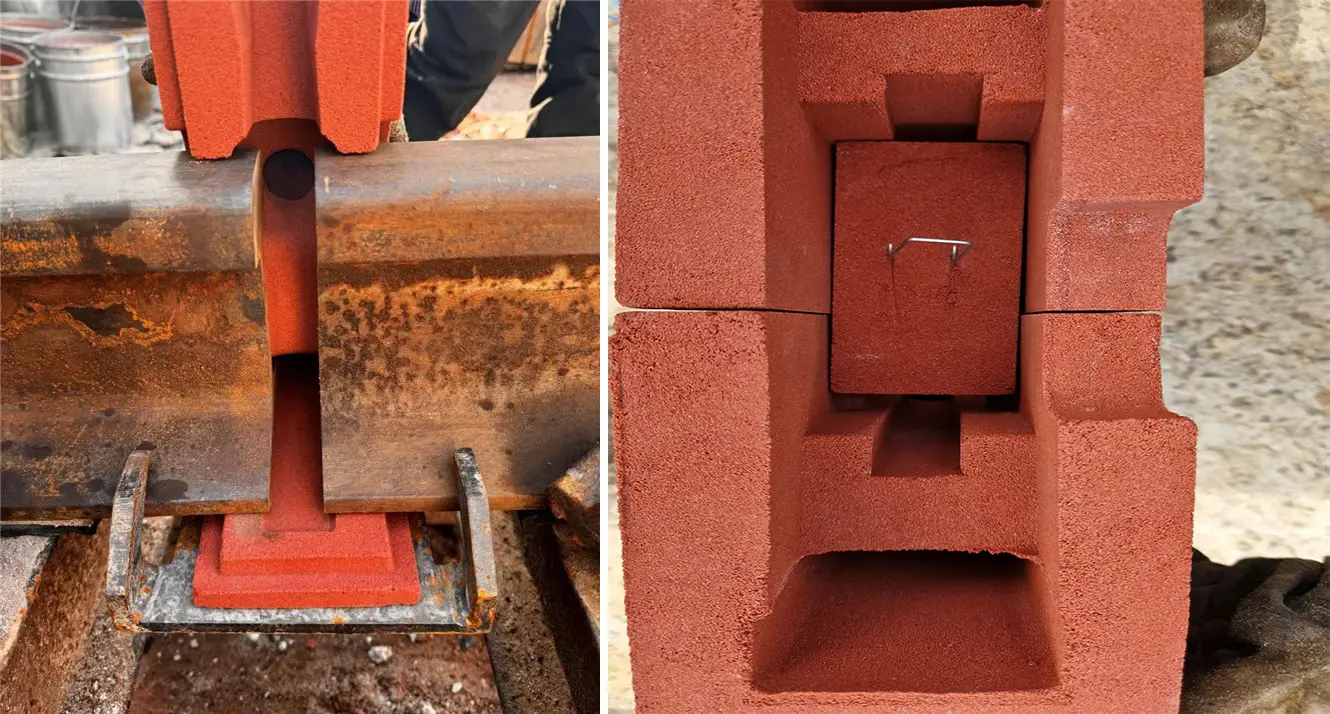
Stp.2 Place the sand mold around the rail ends, ensuring a proper fit. If the moulds do not fit the rail, grind of rail slightly so the rails could fit tightly against the moulds.
Stp.3 Apply tightly the luting sand on the gaps between the moulds by hand. (3KG Luting sand mixture 500ml water).
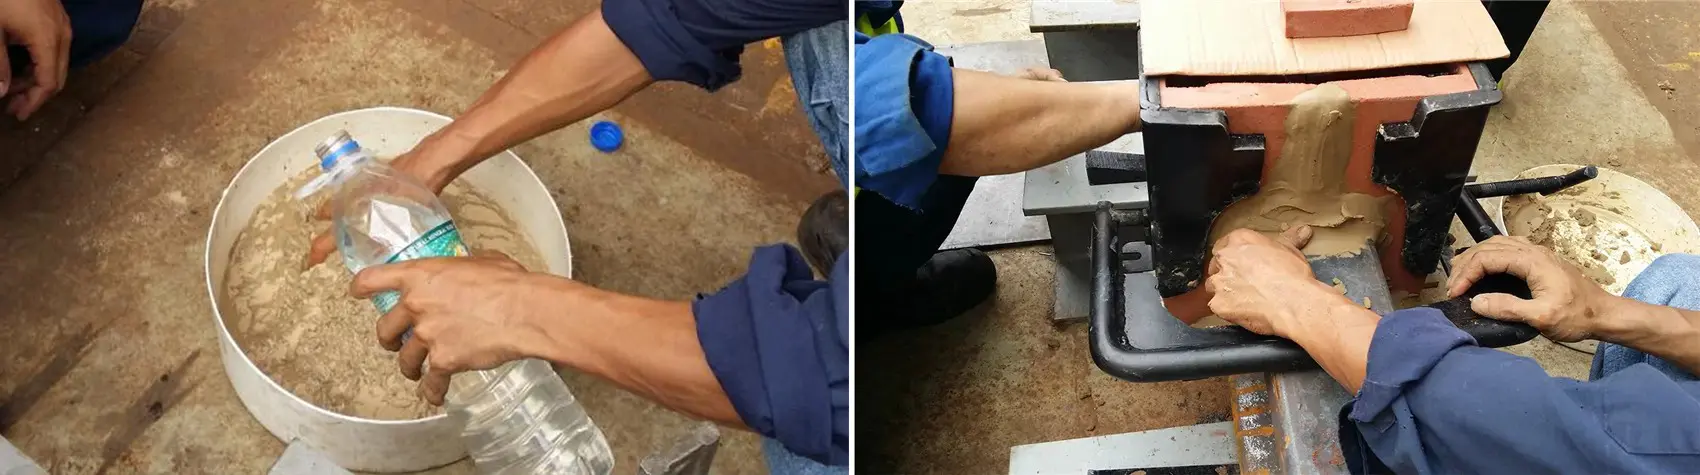
Stp.4 Place the slag tray under the designed pouring hole. Place a small amount of premix sand on the slag tray.

Stp.5 Diverter plug should be placed over the inlet between the moulds.
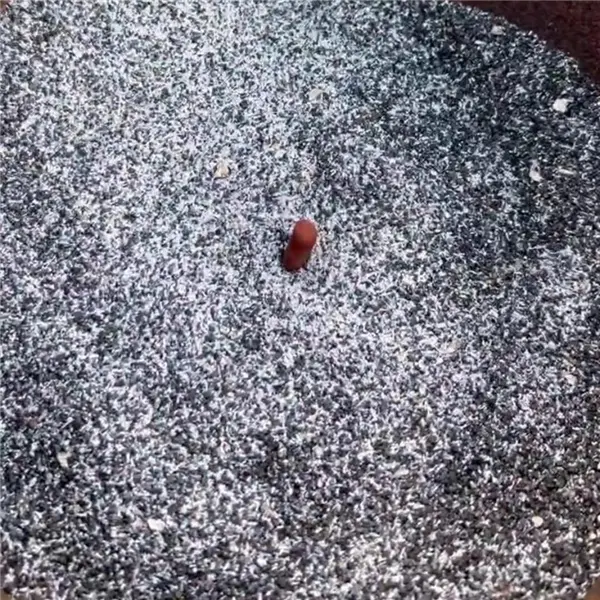
Stp. 6 Measure and pour the required amount of Thermit portion into the crucible.
*Be sure to check the date that was printed on the packaging. Do not use if the powder has expired*
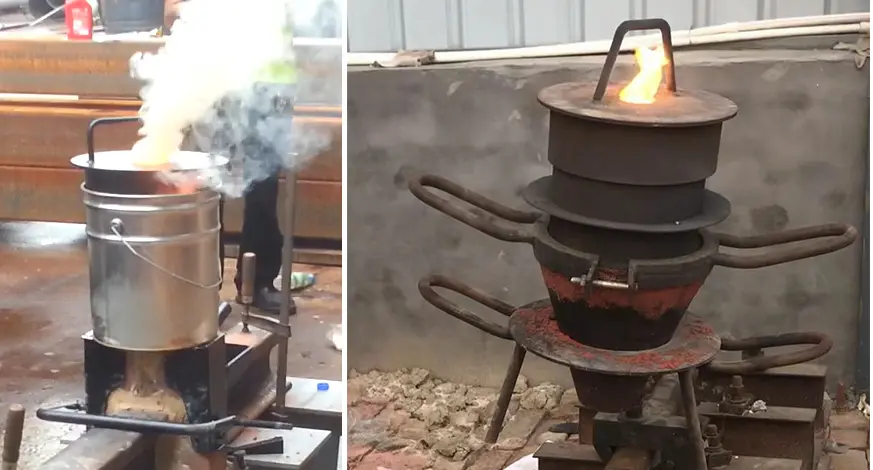
• Preheating:
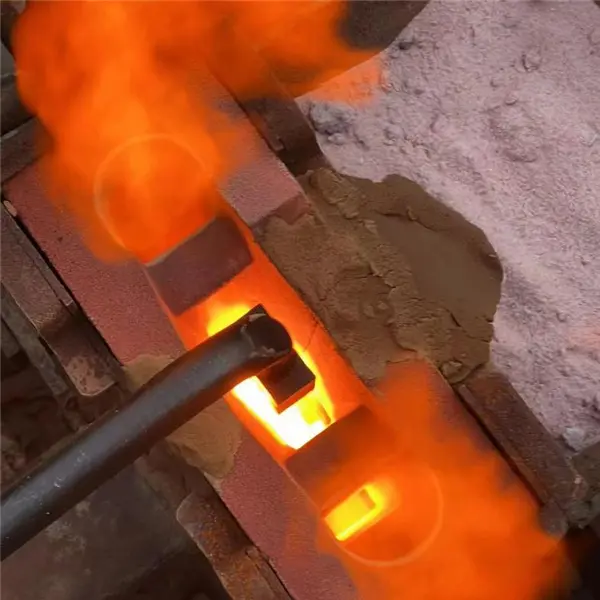
Preheat the rail ends to remove any moisture and increase the welding temperature.
Oxygen working pressure of 0.25~0.30MPa, and Propane working pressure of 0.08~0.10MPa. Adjust the flame of length to 15~25mm, and make sure the preheating flame has an orange color.
Preheating time varies from 6~8 minutes according to the surrounding temperature. When the preheat is complete, remove the burner, turn the valve of the Oxygen and Propane to off. The temperature of rail should reach up to 800~900℃
• Ignition:
Attach the ignitor, insert the ignition source into the center of the Thermit portion in the crucible.
Ignite the ignition source, ensuring a safe distance from the crucible.
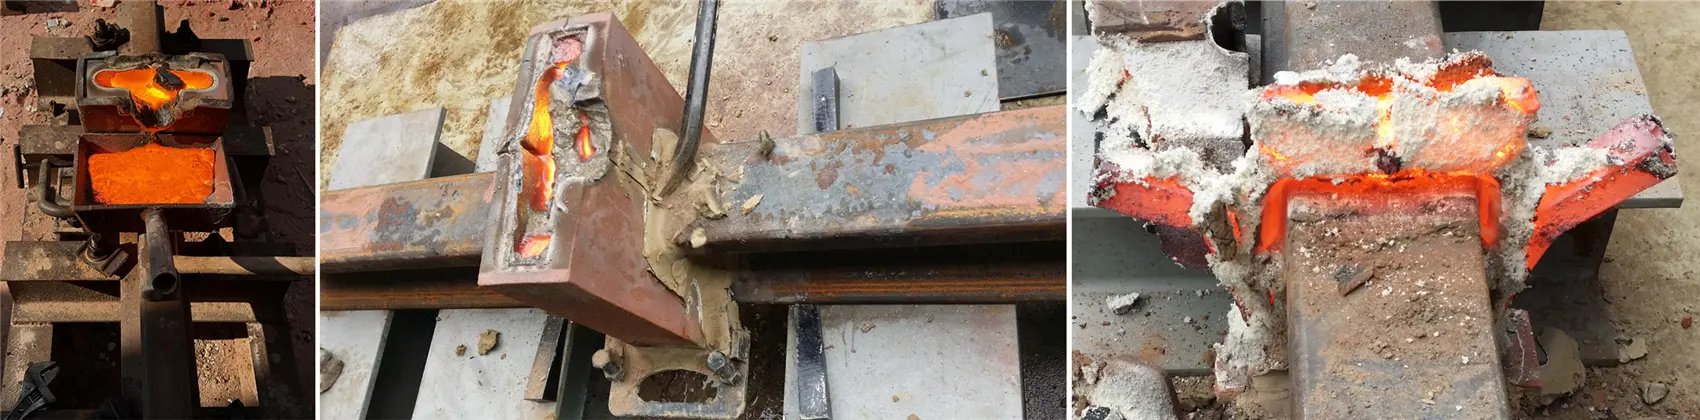
• Reaction and Welding:
The ignited Thermit portion undergoes a highly exothermic reaction, generating intense heat, creating a molten steel fills into the mould ensuring both rail ends welds.
Cooling and Finishing:
Allow the molten steel to cool and solidify in the mold. Remove&shearing the Thermit welding mould once the joint has solidified. Inspect the welded joint for any defects or irregularities.
*Early remove may affect the quality of welded joint. In contrast, late demoulding will make the shearing process more difficult*
• Shearing the extra metal on the surface
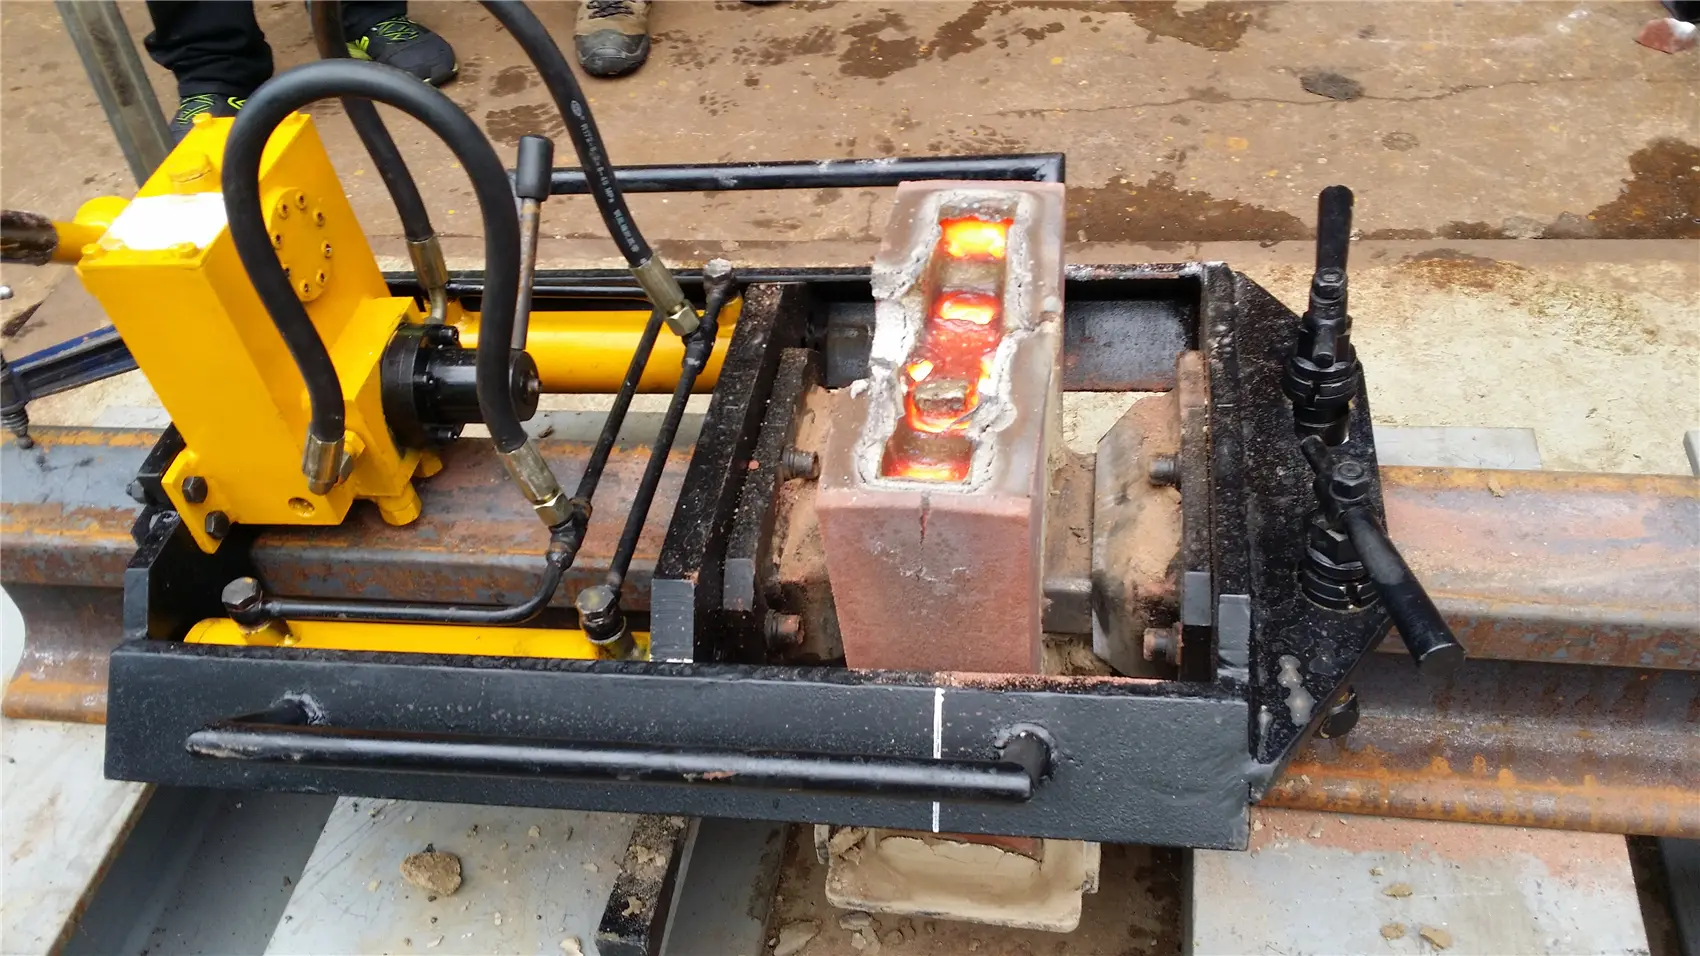
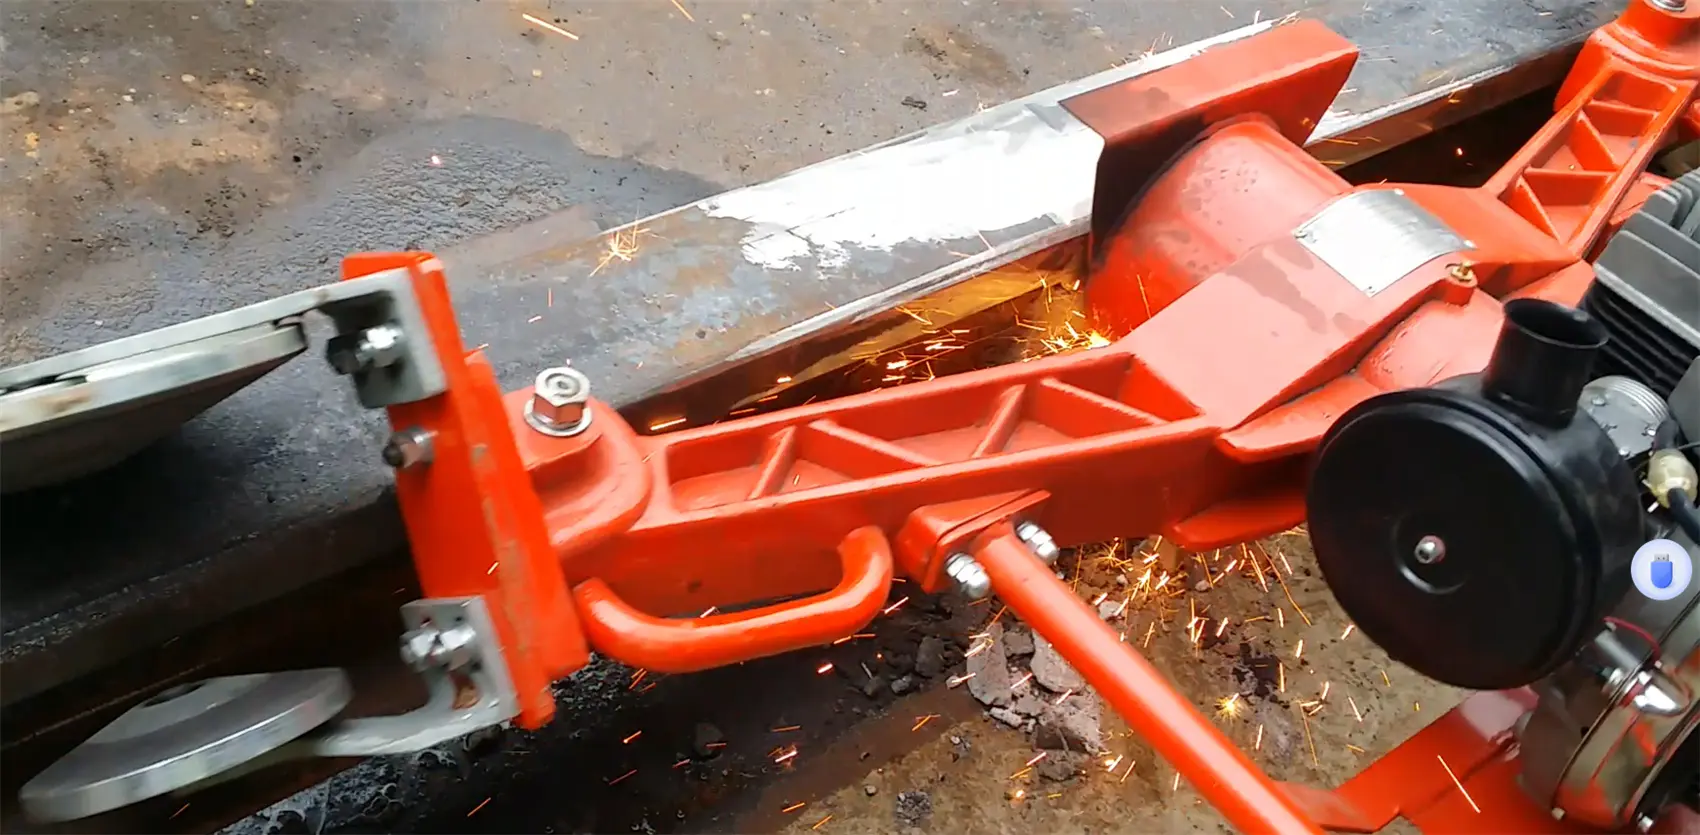
• Grinding:
Grinding excess metal by grinding machine (Electric/petrol type grinding machine)
• Record&Cleaning