Leave Your Message

What Are the Top Welding Tools and Equipment?

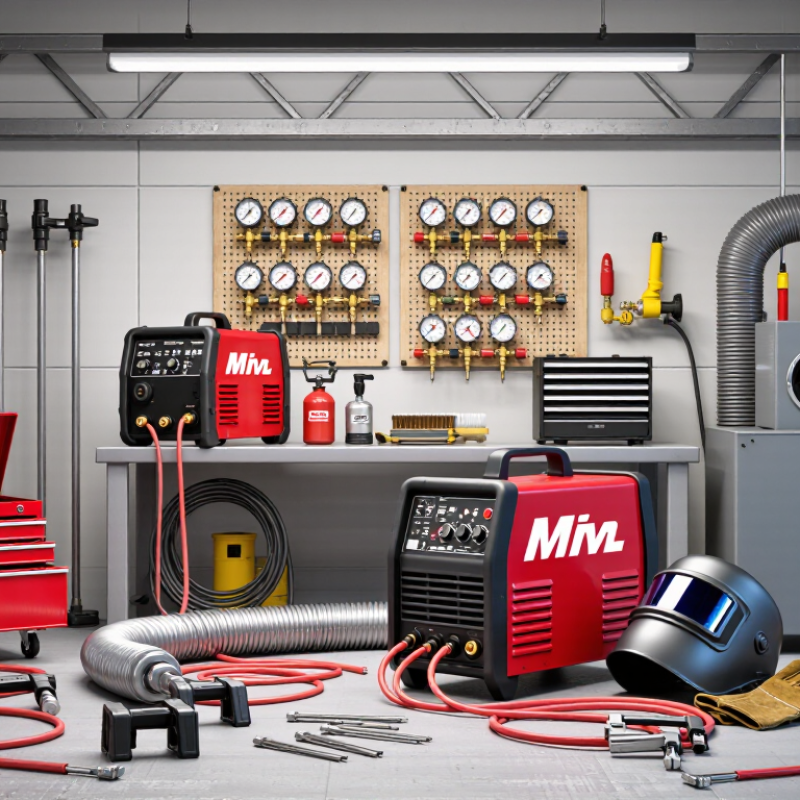
Choosing the right Welding Tools And Equipment begins with understanding the work, not chasing the newest machine. A compact MIG welder may suit thin steel panels, while a heavy-duty TIG system offers better control for stainless steel and aluminum. The correct helmet, gloves, clamps, electrodes, regulators, and ventilation system also influence safety and weld quality. Small details matter. A loose ground clamp can create unstable arcs, uneven beads, and unnecessary rework.

James F. Lincoln, a pioneering welding engineer, emphasized a practical principle: “The quality of a weld depends on the skill of the welder.” His observation remains relevant, although equipment still shapes what a skilled operator can achieve. Reliable tools support consistency, but they cannot replace training, inspection, or sound judgment. A clean joint, correct polarity, suitable amperage, and steady hand often matter more than an expensive brand.

This guide examines the top welding machines and supporting equipment for workshops, construction sites, automotive repairs, and professional fabrication. It considers performance, durability, portability, maintenance, and operator protection. It also looks at overlooked items, including wire brushes, angle grinders, fume extraction, and test gauges. Some equipment choices are not obvious. More power is not always better. A powerful machine may waste energy and complicate delicate work. Personal experience can help, but it can also create blind spots. Checking manufacturer specifications and recognized safety guidance remains essential. Good welding starts with preparation.

What Are the Top Welding Tools and Equipment?

Welding Machines and Power Sources

Welding machines and power sources determine arc stability, penetration, portability, and operating cost. Common choices include transformer units, inverter machines, engine-driven generators, and multiprocess systems. Inverter models usually weigh less and offer finer amperage control. Transformer machines remain attractive for steady shop work because their design is simple and durable. A practical selection starts with the material, thickness, electrode type, and available electrical supply.

The International Energy Agency reports that industrial motor systems can represent a substantial share of factory electricity use. Welding power sources deserve the same efficiency review. Check input voltage, rated output, duty cycle, power factor, and cooling design. The duty cycle matters near a hot fabrication bench. A machine rated at 60% duty cycle may require four minutes of cooling after six minutes of welding. The American Welding Society has also projected a major shortage of skilled welding professionals in the United States by 2028. That pressure makes intuitive controls and reliable equipment increasingly valuable. Still, expensive equipment does not replace proper setup. That assumption needs questioning.

Tips: Match the power source to your real workload, not occasional peak amperage. Inspect cables, ground connections, and ventilation before every shift. Read the rating plate carefully. Portable units need clean, stable power and safe fuel handling. Keep a simple log of faults, arc performance, and maintenance dates. It exposes patterns that memory often misses. Industry market analyses from Grand View Research also identify automation and energy efficiency as key welding-equipment trends, but smaller workshops should test those claims against actual production data.

Essential Welding Tools for Metal Preparation

What Are the Top Welding Tools and Equipment?
Essential Welding Tools for Metal Preparation

Before welding, preparation controls much of the final joint quality. In my workshop experience, poor cleaning causes more trouble than difficult welding settings. A wire brush removes loose rust, scale, and dirt from steel. An angle grinder with suitable discs helps bevel thick edges and remove sharp burrs. Use a file for smaller areas and controlled finishing. Keep a degreasing cloth nearby, but let the surface dry completely.

Accurate measurement also matters. A tape measure, combination square, scriber, and center punch help locate cuts and holes. Clamps hold parts firmly, while a bench vise supports short pieces during filing. For repeatable results, check the fit under bright light. Gaps should be intentional, not accidental. I sometimes rush this stage, and the bead later reveals the mistake. That is a useful reminder: preparation deserves the same attention as welding.

Tips: Inspect discs, brushes, and clamps before use. Replace damaged tools immediately. Wear eye protection, gloves, hearing protection, and flame-resistant clothing. Keep sparks away from solvents, cables, and combustible materials. Clean in a ventilated area, and follow each tool’s safety instructions. A small test piece can expose contamination before it reaches the real project. Do not skip it.

Protective Equipment for Welding Safety

Protective equipment is the most important part of any welding setup. A powerful welder cannot protect a worker from invisible hazards. Welding fumes may contain manganese, nickel, and chromium compounds. The International Agency for Research on Cancer classifies welding fumes as carcinogenic to humans. OSHA sets a 5 micrograms per cubic meter limit for airborne hexavalent chromium over an eight-hour shift. That number is easy to ignore beside bright sparks. It should not be.

A properly shaded helmet protects the eyes and face from ultraviolet and infrared radiation. The lens must stay clean, and the viewing window should not be cracked. Heat-resistant gloves protect hands from sharp edges and hot metal. Flame-resistant clothing, leather boots, and hearing protection complete the basic barrier. In a busy workshop, I have seen sleeves ride up and gloves become oily. Small gaps can cause serious injuries. Respiratory protection also requires a hazard assessment, fit testing, and suitable filters. A loose mask is not real protection.

Tips: Keep local exhaust ventilation close to the arc, not behind the worker. Check airflow before striking the first arc. Replace damaged gear immediately. Do not rely on a helmet alone when fumes collect overhead. NIOSH guidance emphasizes engineering controls before relying only on respirators. That advice is practical, but workers sometimes skip ventilation because it feels slower. I have made that mistake myself. Safety equipment works best when inspected, worn consistently, and matched to the actual metal, coating, and workspace.

What Are the Top Welding Tools and Equipment? - Protective Equipment for Welding Safety
Protective Equipment Primary Hazard Controlled Recommended Features or Specification Typical Inspection or Replacement Practice Relevant Safety Guidance
Welding Helmet Ultraviolet and infrared radiation, visible light, sparks, and flying particles Use a properly fitted helmet with a suitable filter shade for the welding process and operating current. Auto-darkening models should have a functioning light and dark state, intact lens covers, and a secure headgear adjustment. Inspect the shell, lens, sensors, seals, and headgear before each use. Replace cracked shells, damaged cover lenses, or malfunctioning filters immediately. Filter shade selection should follow applicable workplace requirements and recognized welding safety guidance, such as ANSI Z49.1 and OSHA requirements.
Safety Glasses Flying metal particles, slag fragments, dust, and incidental optical radiation Wear impact-rated safety glasses with side protection under the welding helmet. Clear lenses are commonly used for general protection; tinted lenses may be used when appropriate for the task. Check before every use for cracks, deep scratches, loose frames, or poor fit. Replace lenses that reduce visibility or no longer provide reliable protection. Use eye protection meeting the applicable impact-resistance requirements of ANSI/ISEA Z87.1 or an equivalent standard.
Welding Face Shield Large sparks, molten metal, grinding fragments, and radiant heat Use a properly rated face shield over safety glasses when chipping, grinding, gouging, or performing tasks that create substantial flying debris. Inspect the visor, mounting system, and crown or headgear before use. Replace a badly scratched, cracked, or distorted visor. A face shield does not replace primary eye protection; safety glasses or goggles should remain underneath.
Welding Gloves Heat, sparks, molten metal, sharp edges, and brief contact with hot materials Use dry, flame-resistant gloves with sufficient thickness and dexterity for the process. Gauntlet cuffs should overlap the sleeves and protect the wrists and forearms. Inspect for holes, burn-through, hardened areas, torn seams, and contamination before each use. Replace gloves when damage compromises protection. Gloves should be selected according to the welding process, heat exposure, handling requirements, and applicable protective-glove guidance.
Flame-Resistant Jacket or Clothing Burns from sparks, spatter, flame, radiant heat, and brief flash exposure Wear clean, dry clothing made from flame-resistant materials. Use closed cuffs, covered fasteners, and sufficient overlap between the jacket, trousers, gloves, and footwear. Inspect before each shift for holes, frayed seams, exposed fasteners, and embedded metal particles. Do not use clothing contaminated with oil, grease, solvents, or other flammable substances. Clothing should be selected for the work environment and may be evaluated using standards such as ASTM F1506 or equivalent requirements where applicable.
Welding Sleeves or Leather Apron Spatter and radiant heat affecting the arms, torso, and upper legs Use sleeves or an apron when the welding position or workpiece creates increased exposure to sparks and spatter. Ensure the garment does not restrict movement or create a snagging hazard. Check for burned areas, holes, stiffened leather, damaged straps, and open seams. Replace the item when heat or spatter has weakened the material. Use with a flame-resistant work outfit; leather garments should be clean and free from combustible contamination.
Safety Footwear Falling objects, molten metal, hot surfaces, punctures, and electrical contact hazards Wear high-top, sturdy safety footwear with non-melting uppers, secure closures, and protective toe caps where required. Trouser legs should cover the footwear openings without being cuffed. Inspect soles, stitching, toe protection, closures, and upper materials regularly. Replace footwear with worn soles, damaged uppers, or compromised protective components. Selection should follow the workplace hazard assessment and applicable protective-footwear requirements, such as ASTM F2412 and ASTM F2413 where applicable.
Respiratory Protection Welding fumes, metal oxides, gases, and other airborne contaminants Use local exhaust ventilation first whenever feasible. If ventilation does not adequately control exposure, use a properly selected respirator under a written respiratory-protection program, including fit testing for tight-fitting respirators. Inspect the respirator before each use. Replace filters or cartridges according to the approved change schedule, damage, breathing resistance, or manufacturer instructions. Respirator selection must be based on exposure assessment, contaminant identity, oxygen level, and applicable occupational exposure limits.
Hearing Protection Noise from arc welding support equipment, grinding, cutting, and nearby operations Use earplugs or earmuffs when noise levels require protection. Choose a suitable noise reduction rating and ensure proper fit and consistent use. Clean reusable devices regularly. Replace disposable earplugs after use and replace damaged or poorly sealing earmuffs. Conduct a workplace noise assessment and follow applicable hearing-conservation requirements when exposure may reach hazardous levels.
Welding Screens or Curtains Arc radiation exposure to nearby workers and bystanders Install non-combustible or fire-resistant welding curtains or screens around the work area. Curtains should block direct arc viewing while maintaining suitable visibility and ventilation. Inspect regularly for holes, gaps, damaged fasteners, and loss of flexibility. Keep screens positioned to prevent direct line-of-sight exposure to the arc. Use barriers as an engineering control in addition to the welder’s personal protective equipment; do not use them as a substitute for ventilation or safe work practices.

Consumables and Accessories Used in Welding

What Are the Top Welding Tools and Equipment?

Consumables and accessories often determine weld quality more than the power source. Welding wire, electrodes, shielding gas, contact tips, and abrasive discs directly affect penetration, arc stability, and cleanup. AWS’s Welding Workforce Data report projects a U.S. need for about 330,000 welding professionals by 2028. That pressure makes repeatable consumable selection increasingly important.

A practical setup begins with matching the filler metal to the base metal and joint design. Check diameter, tensile strength, storage conditions, and required polarity before welding. Damp electrodes can create porosity and hydrogen-related cracking.

Wire feeders also need clean liners and correctly sized contact tips. Small errors matter. A loose ground clamp may produce an unstable arc, even when the machine settings appear correct.

Accessories deserve equal attention. Use sound leads, a properly rated regulator, gas hoses without leaks, and a shade-rated helmet. Local exhaust ventilation is essential because welding fumes can contain hazardous metals. OSHA requires employers to control exposure through ventilation and other protective measures. The U.S. Bureau of Labor Statistics projects roughly 42,600 annual openings for welders, cutters, solderers, and brazers from 2023 to 2033.

More operators may enter the trade, but training cannot replace inspection. I have found that cleaning each joint twice feels excessive, yet skipped preparation often costs more than the extra minute. Consumables are not disposable details; they are part of the weld design.

Specialized Equipment for Different Welding Processes

Specialized equipment matters because each welding process controls heat, shielding, and metal transfer differently. Gas metal arc welding needs a constant-voltage power source, wire feeder, shielding-gas regulator, contact tips, and a suitable torch. Its speed suits production work, but poor gas flow can create porous welds. In a real shop, a simple flowmeter check often prevents expensive rework.

Gas tungsten arc welding requires a high-frequency start, precise amperage control, a torch, tungsten electrodes, and separate filler rods. It produces clean, controlled welds on thin stainless steel and aluminum. Shielded metal arc welding uses a compact power source, electrode holder, cables, and ground clamp. It remains practical outdoors because wind affects gas-shielded processes more severely. Flux-cored welding can add a wire feeder and extraction system, especially when smoke and slag increase.

The equipment market reflects this process diversity. Grand View Research estimates the global welding equipment market reached about 15.85 billion dollars in 2023, with projected growth through 2030. The report links demand to manufacturing, construction, and repair activity. The U.S. Bureau of Labor Statistics projects about 42,600 annual openings for welders, cutters, solderers, and brazers from 2023 to 2033. That workload makes ergonomic torches, reliable cooling, fume extraction, and calibrated meters more than optional accessories. A perfect setup is a myth. I would still question any purchase based only on amperage. Duty cycle, service access, operator skill, and the joint’s position often matter more.