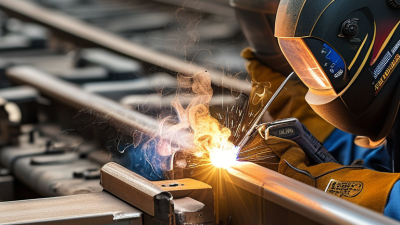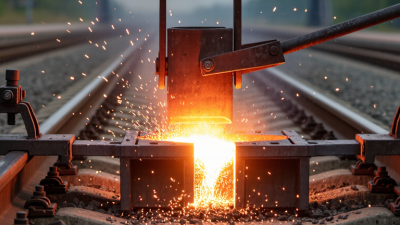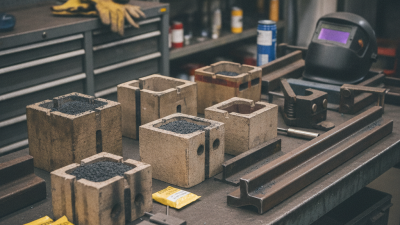
Global rail projects place unusual demands on every field weld. A kit may travel from a coastal depot to a high-altitude site, where humidity, wind, and limited storage affect handling. The choice is not merely about price. It is about matching the welding process, rail section, joint design, and site conditions.
The International Energy Agency’s 2019 Future of Rail report notes that rail carries about 8% of global passenger transport and 7% of freight, while using roughly 2% of transport energy. That scale makes dependable track infrastructure important. Quality-management expert W. Edwards Deming’s maxim, “In God we trust; all others must bring data,” is a useful reminder here: compare documented procedure limits, test records, consumable traceability, and training requirements—not brochure claims alone.
This guide explains how to assess Thermit Welding Kits for cross-border projects, from mold and crucible compatibility to packaging, technical support, and repeatable quality checks. It also considers practical details, such as whether the kit’s consumables tolerate the project’s storage conditions and whether operators can follow its instructions on a noisy night shift. A checklist helps, but it cannot replace qualified engineering review. Some project variables will still be uncertain; identifying them early is better than pretending otherwise. The right choice is the kit supported by evidence, suited to the site, and backed by a supplier able to answer specific technical questions.

Thermit welding kits should match the actual rail profile, steel grade, joint gap, and site conditions—not simply the project’s location. AAR’s 2024 Railroad Facts reports that U.S. Class I railroads operated about 136,600 route-miles in 2023. That scale highlights why project teams must confirm rail sections and approved welding procedures at each worksite. Check mold fit, charge size, preheating equipment, and consumables against the rail specification. Small details matter. Wind, rain, and cold can affect preheating and cooling, so include weather limits and inspection requirements in the kit plan.
Structural applications need a different review. World Steel Association’s World Steel in Figures 2024 reports global crude steel production of 1,882.6 million tonnes in 2023, reflecting the variety of steels used across construction. But that total cannot identify a component’s weldability. Confirm the steel grade, joint design, load path, and engineer-approved procedure before selecting a kit. For either application, assess crew competence, access for molds and crucibles, storage conditions, and the availability of replacement parts. A checklist helps, but it may still miss awkward site constraints. Verify the proposed kit against the project specification and trial conditions before deployment.

Choosing a thermit welding kit starts with the rail, not the box. Confirm the rail profile, steel grade, end gap, and approved welding process. A typical kit includes a portion pack, refractory crucible, mold, sealing sand, and ignition materials. Preheating equipment and finishing tools may be supplied separately. Small parts matter. A mold made for another profile can leave poor fit-up, even when the portion pack seems suitable.
UNIFE’s World Rail Market Study 2024 estimates the global rail supply market averaged €201 billion annually in 2021–2023. That scale reflects varied infrastructure and operating conditions, so a kit suited to one project may not suit another. Check the supplier’s process documentation against EN 14730-1:2017 for process approval and EN 14730-2 for welder and contractor approval. Match the documented procedure to the rail grade and site conditions. Paper compatibility is not field compatibility; that distinction is easy to underestimate.
Tips: Before ordering, compare the kit label with the rail profile and welding procedure. Confirm mold size, portion designation, preheat requirements, and storage conditions. Keep records of batch details and ambient conditions. A complete-looking kit can still be the wrong one.
Typical thermit welding kit components and their relevance at each process stage
A value of 1 indicates that the component is typically used at that stage; 0 indicates it is not typically used. This is a qualitative process guide, not a performance rating. Confirm rail profile, welding procedure, and local standards before selecting a kit, since component specifications vary by application.
A thermit welding kit should match the parent material, joint geometry, and required weld profile. Confirm the material grade and section dimensions before selecting the mold and charge. A small mismatch can change heat flow, leaving incomplete fusion or excess metal. Request documented compatibility and procedure qualification records rather than relying on a broad “universal” claim. Standards differ. Check the project specification and acceptance criteria with the responsible engineer; a kit suitable for one application may not meet another region’s inspection requirements.
Site conditions matter just as much. Wind can disturb preheating, while moisture, dust, and low temperatures can affect setup and weld quality. Check the kit instructions for weather limits, storage conditions, and consumable shelf life, especially after long transport. On remote sites, spare molds and clear batch traceability are practical details, not paperwork alone. Train crews on the exact kit and procedure, then make a trial weld on representative material where required. Record the batch, preheat readings, weather, operator, and inspection results. Even a careful review can miss a site-specific wrinkle.
How to Choose Thermit Welding Kits for Global Projects?
Evaluating Safety, Training, and Regulatory Requirements
A kit should fit the project’s rail section, joint design, and site conditions, but safety documentation comes first. Check that instructions clearly describe mold preparation, preheating, ignition, cooling, and cleanup. Operators need suitable protective clothing, face shields, heat-resistant gloves, and a controlled work area. Keep people clear of the pour zone. Hot metal and damp materials are a dangerous combination, so storage and site checks matter.
Training should include supervised practice, not just a manual or a quick briefing. Workers should demonstrate each stage, recognize damaged molds, and know what to do if a pour does not proceed as planned. Use training materials in languages the crew understands. A small misunderstanding can become a serious hazard. I have seen plans look complete on paper while leaving little time for practice; that gap deserves an honest review.
Requirements differ by country and project. Before purchasing, confirm applicable rail specifications, worker-safety rules, welding qualification requirements, and controls for transporting and storing consumables. Ask the project’s safety lead or a qualified local specialist to verify current requirements. Keep training records, inspection logs, and kit documentation accessible on site. Even a well-selected kit cannot compensate for unclear responsibilities or rushed work.
Choosing a thermit welding kit for an overseas project means assessing the supplier as carefully as the equipment. Ask for clear technical documents, compatibility details, inspection records, and guidance on storage and handling. Can the supplier help match the kit to rail profiles, joint requirements, and local site conditions? A quick, specific answer is a useful sign. So is consistent documentation.
Shipping plans need practical details. Confirm package dimensions and weights before booking freight, then compare them with site access and unloading capacity. Check lead times for the complete kit, not just its main components. Small missing items can delay a crew. Verify labeling, packing lists, and shipment paperwork with your logistics provider, and ask how delays or damaged packages are handled. Keep a buffer. It may feel excessive, but remote sites rarely benefit from optimistic arrival dates.
Support matters after delivery. Ask whether technical help is available across your working hours, and whether instructions can be provided in a language the crew understands. Discuss training, troubleshooting, replacement parts, and how the supplier handles product changes. A trial shipment or sample document review can reveal gaps before a full order. I would not assume every detail is settled just because the quotation looks complete; freight terms and site needs are easy to misunderstand. Clarify them in writing.
| Evaluation area | What to verify | Project planning guidance |
|---|---|---|
| Process and application fit | Confirm the kit is designed for the rail or other components, material grades, section profiles, and joint configuration in the project specification. | Provide drawings, material details, and the governing project requirements before requesting a quotation. |
| Standards and approvals | Ask which welding procedures, inspection requirements, and approvals apply, and request evidence accepted by the project owner or relevant authority. | Requirements vary by country, infrastructure owner, and application; obtain acceptance before placing an order. |
| Kit completeness | Request an itemized list covering the reaction charge, molds, ignition materials, sealing materials, and any required tools or protective equipment. | Confirm which items are reusable, consumable, or supplied separately, and check that quantities match the planned number of welds. |
| Quality and traceability | Check batch identification, inspection records, product specifications, shelf-life information where applicable, and a process for handling nonconforming material. | Agree how batch records and delivery documents will be linked to worksite weld records. |
| Supplier capability | Assess relevant application experience, technical response capability, production capacity, and the ability to provide consistent documentation. | Request references for comparable applications and identify the technical contact responsible for pre-sale and post-sale support. |
| Dangerous-goods classification | Obtain the current safety data sheet and written transport classification for each relevant product and packaging configuration. | Confirm applicable origin, transit, destination, and carrier rules with qualified shipping personnel before dispatch; do not assume the same classification applies everywhere. |
| Export and import paperwork | Agree who prepares the commercial invoice, packing list, safety documentation, origin information, and any permits or declarations required for the route. | Confirm the importer of record, customs responsibilities, and delivery term in the purchase contract. |
| Packaging and storage | Verify packaging is suitable for the declared transport classification and that storage conditions, handling instructions, and shelf-life controls are documented. | Plan secure, dry storage at the destination and inspect packages on receipt in accordance with supplier instructions. |
| Lead time and replenishment | Request a delivery schedule that separates production time, regulatory review, transport, customs clearance, and final delivery. | Allow contingency for route changes and customs delays; set reorder triggers based on the work schedule and confirmed shelf life. |
| Training and field support | Confirm access to current work instructions, operator training, troubleshooting guidance, and a clear escalation process for technical issues. | Check support hours, language availability, remote-support options, and whether on-site assistance can be arranged where required. |
| Warranty and after-sales service | Review warranty scope, exclusions, claim documentation, response targets, and procedures for replacement or investigation of defective items. | Record agreed service commitments and the responsible contacts in the purchase documents. |
| Total delivered cost | Compare the complete cost, including kit contents, packaging, transport, insurance, customs charges, local handling, training, and replenishment. | Compare quotations on the same technical scope, delivery location, delivery term, and support assumptions. |