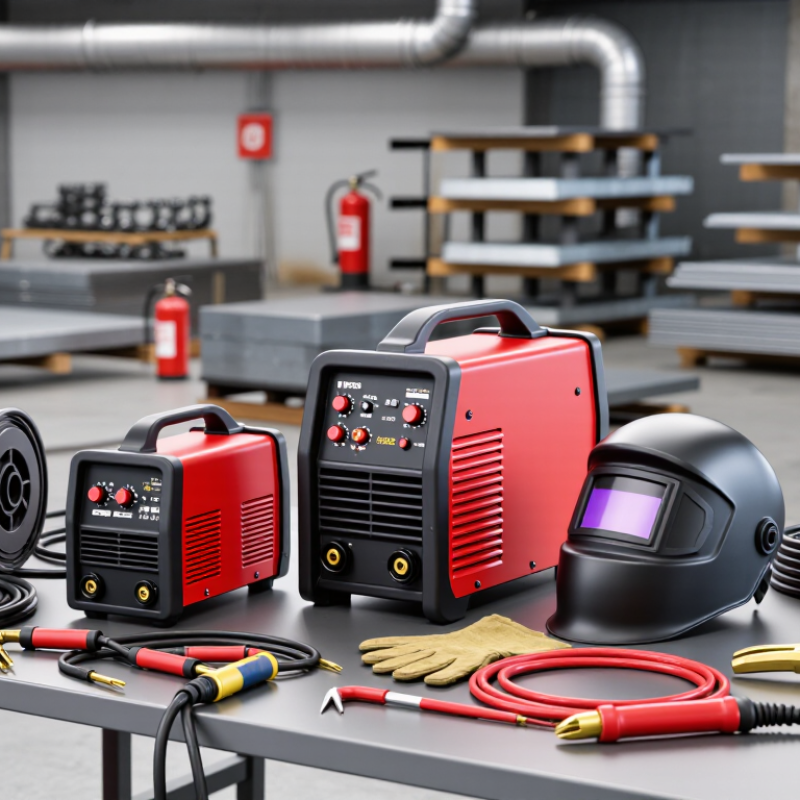
Choosing Welding Tools Equipment in 2026 is no longer about buying the largest machine available. It is about matching tools to materials, joint designs, work locations, and operator skill. A compact inverter may handle stainless steel beautifully, while a heavy fabrication shop may need a dependable multi-process welder. The wrong match wastes power, time, and consumables. Sometimes, buyers discover this too late.
James F. Lincoln, co-founder of Lincoln Electric, said, “The most important thing in welding is the welder.” His observation remains practical today. Digital controls can improve consistency, but they cannot replace sound technique, careful preparation, or proper inspection. Experienced welders still check cable condition, grounding, duty cycle, torch comfort, and ventilation before starting work. Small details matter.
This guide examines how to compare Welding Tools Equipment for modern workshops, repair teams, and serious home users. It considers arc stability, amperage range, portability, energy efficiency, maintenance access, and manufacturer support. Safety features also deserve attention, including thermal protection, reliable leads, suitable helmets, and clear operating instructions. Certification claims should be verified through credible technical documents, not attractive packaging.
Expect some trade-offs. A cheaper machine may perform well initially, yet its replacement parts could be difficult to source. A premium model may offer better control, but its features may exceed a beginner’s needs. No single setup fits every welder. Reflect on your actual projects, not imagined ones. Then choose equipment that supports safe, repeatable, and measurable results.
Choosing welding tools in 2026 begins with the task, not the equipment catalogue. Identify the joint type, weld position, thickness, and required production rate. A repair on a thin steel bracket needs different control than a long structural seam. Ask how much access the torch, gun, or electrode holder will have. Tight corners often expose poor equipment choices.
Material selection changes the decision. Carbon steel, stainless steel, and aluminum respond differently to heat, contamination, and shielding gas. Check the material grade and thickness before choosing a power source. Clean surfaces carefully, especially around paint, oil, rust, or moisture. These details affect porosity and weak fusion. I once underestimated a thin aluminum section and used too much heat. The result looked acceptable, but distortion appeared after cooling.
Working conditions deserve equal attention. In a workshop, stable electricity and fixed ventilation simplify setup. Outdoor work may require wind protection, longer leads, and weather-resistant storage. Confined areas demand tested ventilation, suitable respiratory protection, and careful gas-cylinder placement. Confirm duty cycle, cable condition, grounding, and control access before welding. Keep fire-resistant barriers nearby. Do not rely on appearance alone. A smooth bead can still hide incomplete penetration, so inspect critical joints according to the applicable procedure and qualification requirements.
Define the welding task, base material, thickness, and working conditions before selecting a welding process and equipment setup.
Practical suitability index from 1 to 5, where 5 indicates stronger suitability. Self-shielded FCAW is generally more tolerant of outdoor wind, GTAW provides the best control for thin materials, GMAW is versatile for production work and aluminum when the correct wire and shielding gas are used, and SMAW remains highly portable for field welding. Final equipment selection should also consider joint design, required weld quality, duty cycle, power availability, and operator skill.
Choosing welding equipment starts with the joint, material, location, and required finish. The cheapest process is rarely the best match.
suits clean steel projects, repair work, and repeated joints in a workshop. It is easy to learn, but wind can disturb its shielding gas outdoors.
handles outdoor fabrication better and penetrates thicker steel, although it creates more smoke and slag.
remains practical for rusty surfaces, heavy plate, and remote repairs. It needs steady hand control.
produces precise, clean welds on stainless steel and aluminum. However, it is slower and demands careful cleaning, torch control, and filler selection.
Match the machine to the workload, not only the maximum amperage. Check duty cycle, input power, cable length, torch comfort, and available consumables.
A compact inverter may suit a mobile repair kit, while a higher-duty machine fits production work. For aluminum, confirm the equipment supports the needed current type and torch setup. Test the process on matching scrap before welding the actual frame.
Watch the arc, bead shape, penetration, and heat distortion. I have seen attractive welds fail because the base metal was contaminated or the settings were rushed.
Slow down. Measure twice.
Use proper eye, hand, respiratory, and ventilation protection, then have critical work checked against applicable welding standards by a qualified person.
A reliable welding setup begins with tools that control heat, movement, and visibility. Choose a welding machine that matches the metal thickness, duty cycle, and available electrical supply. An inverter unit is often easier to transport, but its controls still require careful testing. Check the machine’s output range before buying. Your work may change. Use properly rated leads, a clean earth clamp, and flexible electrode holders. Loose connections create unstable arcs and unnecessary heat.
Protective equipment deserves equal attention. A certified auto-darkening helmet should fit securely and provide the correct shade for the process. Wear flame-resistant clothing, leather gloves, safety boots, and hearing protection near grinding work. Keep ventilation moving fumes away from your breathing zone. A local exhaust hood is preferable when practical. Add a fire-resistant screen, a suitable extinguisher, and a clear floor around the joint. Small sparks travel farther than expected.
Power equipment needs a simple inspection routine. Before welding, examine plugs, insulation, grounding, and extension-cord capacity. Never force a circuit beyond its rated load. A portable generator may help outdoors, but confirm stable output and required wattage. Keep an angle grinder, wire brush, chipping hammer, clamps, measuring tape, and a bright work light nearby. I often recheck the clamp after the first pass; it seems excessive, yet arc starts improve. I still forget small items sometimes. That flaw is useful. Write a checklist. Test on scrap metal, watch the bead, and adjust slowly rather than trusting assumptions.
| Tool or Equipment | Primary Welding Process | Typical Power Requirement | Suitable Material Thickness | Key Specification to Check | Best Use Case | Important Safety Requirement | Selection Guidance |
|---|---|---|---|---|---|---|---|
| Inverter Stick Welder | Shielded metal arc welding (SMAW) | 120 V or 230 V input; commonly 100–200 A output | Approximately 3–12 mm, depending on electrode size and joint design | Output amperage range, duty cycle, electrode diameter, arc-start performance | Outdoor repairs, structural steel, agricultural equipment, and work where shielding gas is impractical | Welding helmet, fire-resistant clothing, insulated gloves, ventilation, and dry electrode storage | Choose a model with adjustable current, overheat protection, and compatibility with common electrodes |
| MIG/MAG Welder | Gas metal arc welding (GMAW) | 120 V for light work; 230 V is preferable for higher output | Approximately 1–10 mm with suitable wire, shielding gas, and settings | Wire-feed range, duty cycle, spool capacity, inductance control, gas-gun connection | Fabrication, automotive repair, sheet metal, and repetitive production welding | Use the correct shielding gas, adequate ventilation, and protection from flammable vapors | Select a unit with stable wire feeding, adjustable voltage and wire speed, and thermal overload protection |
| Multi-Process Welder | MIG/MAG, TIG, and SMAW | Usually 120/230 V; output commonly 150–250 A | Approximately 1–12 mm, depending on process and material | Process changeover, TIG lift-start or high-frequency start, duty cycle, polarity selection | Workshops handling steel, stainless steel, aluminum, and varied repair tasks | Use process-specific PPE, correct torch connections, proper gas flow, and electrical grounding | A practical choice when space or budget limits the purchase of separate machines |
| TIG Welder | Gas tungsten arc welding (GTAW) | 120 V for thin materials; 230 V for higher current and aluminum work | Approximately 0.5–8 mm, with precise control at low amperage | Low-amperage stability, pulse control, AC capability for aluminum, foot-pedal compatibility | Stainless steel, aluminum, precision fabrication, pipe joints, and visible finish work | Argon shielding gas, clean work surfaces, UV-rated eye protection, and strict ventilation control | Choose AC/DC capability for aluminum and pulse control for thin or heat-sensitive materials |
| Plasma Cutter | Thermal cutting; not a welding process | 120 V for light cutting; 230 V for higher cutting capacity | Commonly 3–25 mm, depending on rated and production cut capacity | Rated cut capacity, duty cycle, compressed-air demand, pilot-arc type, consumable cost | Fast cutting of mild steel, stainless steel, aluminum, and painted or coated metal | Full face and eye protection, hearing protection, ventilation, and protection from sparks and slag | Compare production cut capacity rather than maximum severance capacity |
| Portable Engine-Driven Welder | SMAW, generator-supported MIG or TIG | Fuel-powered; welding output often 150–300 A | Approximately 3–20 mm, depending on output and process | Continuous welding output, generator wattage, fuel consumption, noise level, duty cycle | Remote construction, field maintenance, pipelines, and sites without reliable utility power | Never operate indoors or in poorly ventilated areas; use grounding and fuel-storage controls | Prioritize generator capacity and serviceability when powering grinders, lights, or other tools |
| Portable Angle Grinder | Preparation, cleaning, grinding, and cutting | Typically 120 V or rechargeable battery power; common disc sizes are 115–125 mm | Suitable for removing surface material and cutting light-to-medium metal sections | Disc diameter, rated speed, power, spindle lock, guard adjustment, vibration control | Removing rust, mill scale, weld spatter, sharp edges, and defective weld metal | Face shield plus safety glasses, hearing protection, gloves, correct guard, and rated discs | Use separate discs for cutting, grinding, and stainless steel to reduce contamination and breakage risk |
| Welding Fume Extractor | Air-quality control for all arc-welding processes | Electrical; commonly 0.5–2.2 kW depending on airflow and filtration design | Not applicable | Airflow, capture distance, filter class, filter loading indicator, noise level | Indoor welding, stainless steel work, production areas, and enclosed fabrication spaces | Use source capture close to the arc and maintain filters according to manufacturer instructions | Source extraction is generally more effective than relying only on general room ventilation |
| Welding Helmet | Eye and face protection for arc welding | Battery-powered, solar-assisted, or rechargeable auto-darkening lens | Not applicable | Optical clarity, shade range, switching speed, viewing area, sensitivity, grind mode | All arc-welding, plasma-cutting, and grinding operations when the helmet is rated for the task | Use the correct shade for current and process; inspect the lens, shell, and headgear regularly | A clear optical view and comfortable fit improve weld-position accuracy and consistent use |
| Welding Leads and Electrode Holder | SMAW and general welding power delivery | Selected according to welding current, cable length, and duty cycle | Not applicable | Cable cross-sectional area, insulation rating, connector type, flexibility, heat resistance | Connecting the power source, work clamp, and electrode holder safely | Inspect for exposed conductors, damaged insulation, loose connections, and overheated clamps | Use the shortest practical cable length and an appropriate cable size to limit voltage drop and heating |
| Shielding Gas Regulator and Flowmeter | MIG/MAG and TIG welding | Mechanical gas-control device; typical flow settings are about 8–25 L/min | Not applicable | Gas compatibility, inlet pressure rating, flow accuracy, connector type, hose condition | Controlling argon, carbon dioxide, or mixed shielding gas during welding | Secure cylinders upright, keep away from heat, check leaks, and never use oil on oxygen equipment | Choose a regulator matched to the gas service and expected cylinder pressure |
| Welding Table and Clamps | Workholding for all welding processes | Passive equipment; no electrical power required | Depends on table thickness, load rating, and fixture design | Flatness, hole pattern, load capacity, heat resistance, grounding provision, clamp reach | Accurate positioning, repeatable fabrication, tack welding, and distortion control | Keep the work area clear, use stable supports, and ensure the work clamp has a clean contact point | A rigid, heat-resistant table with versatile clamps improves accuracy and reduces rework |
| Welding Positioning Fixture | Workholding and controlled access to joints | Manual or powered; powered units may use 120 V or 230 V | Based on rated load, center of gravity, and fixture size | Load capacity, rotation speed, tilt range, chuck or clamp system, foot-control options | Rotating cylindrical parts, repetitive joints, and improving weld-position consistency | Guard moving parts, secure the load, and prevent accidental rotation during setup | Match the rated load to the actual workpiece weight, including offset loads |

Choosing welding equipment in 2026 should begin with the worker, not the machine. OSHA estimates that more than 500,000 U.S. workers face welding, cutting, and brazing hazards. That figure makes protective planning a purchasing requirement, not a minor checklist item. Select a helmet with the correct shade range, impact-rated eye protection, flame-resistant clothing, insulated gloves, hearing protection, and safety footwear. Check fit under actual working conditions. A loose cuff near hot metal is not a small problem.
Fume control deserves equal attention. The International Agency for Research on Cancer classified welding fumes as carcinogenic to humans in 2017. Use local exhaust ventilation close to the arc, then verify airflow rather than trusting a quiet fan. Respiratory protection may be necessary after exposure assessment, but it cannot replace source capture. The NIOSH criteria document on welding, brazing, and thermal cutting also emphasizes ventilation and exposure control. Test the system while welding, with doors closed and nearby workers present.
Accessories must match the workplace. Inspect leads for cracked insulation, keep gas cylinders secured, and use regulators suited to the gas service. Grounding points should be clean and reachable. A pre-use inspection should take less than five minutes. Still, many teams rush it. I have seen checklists completed while damaged cables remained in service. That habit needs challenging. Review the layout for sparks, combustible materials, restricted airflow, wet floors, and emergency access. Confirm training records, maintenance intervals, and local occupational rules before approving the purchase.
Choosing welding equipment requires more than comparing prices. In 2026, quality, compatibility, cost, and maintenance should guide every purchase. From workshop experience, a strong frame and stable controls usually indicate better long-term reliability. Inspect the torch, cables, connectors, and ground clamp closely. Loose fittings can create unstable arcs and unnecessary rework.
Compatibility prevents expensive surprises. Check the machine’s input voltage, duty cycle, material range, and connection type before ordering. Your wire, electrodes, gas system, and protective equipment must work together. For mixed projects, select tools with adjustable settings and clear operating instructions. I once chose a lower-cost unit without checking its duty cycle. It overheated during repeated welds. That mistake delayed the job and damaged my confidence in quick comparisons.
Tips:
Calculate the total cost, including consumables, replacement parts, servicing, and electricity. Ask whether manuals, maintenance schedules, and technical support remain available. Keep a small budget for worn liners, contact tips, filters, and cables. A five-year service plan may matter more than a low purchase price. Check inspection records when buying used equipment. If a tool feels awkward after ten minutes, reconsider it. Comfort affects accuracy, even when specifications look excellent. Record cleaning dates and unusual sounds, then arrange qualified servicing before small faults become costly repairs.